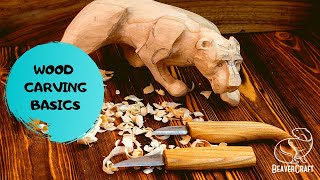
This is the place to learn how to carve wood-carved caricatures. This section will teach you about safety, design, and techniques. You can transform a standard caricature into a masterpiece. Here are some tips to help you make your caricature unique. There are also classes offered by caricaturists.
Techniques
Wood carving caricatures are a unique form of sculpture. They're funny and can tell a tale without words. Caricature is an exaggerated representation of a real person. Dave Stetson is one of the best wood carvers. He adheres to a strict code for realism. There are certain rules you should follow to create an effective caricature. This article will discuss the basics and give some tips for creating a caricature.
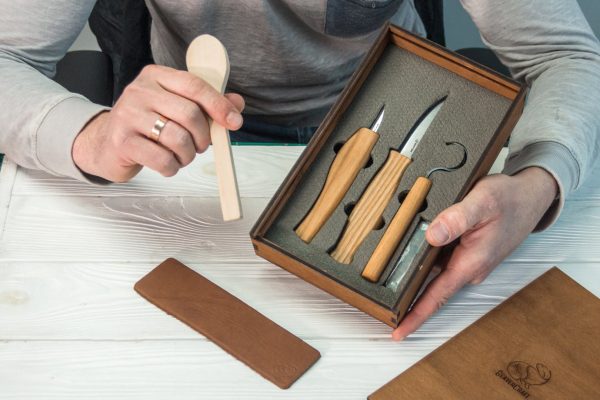
First, it requires great focus when carving an astronaut. You will need to use either a spoon carving knife or whittling knife to carve an astronaut. Both are delicate tools. To make the job easier, you can use templates while you are carving the astronaut. A good tutorial will offer step-by–step instructions on how you can finish your caricature. A tutorial on this subject might be worth your consideration if you are tight on budget.
Designs
There are many ways to create amusing wood carved caricatures. A pattern is a good place to start. You can also purchase a cardboard cutout and use the same patterns for carving different types of caricatures. You can also use the tutorial to carve a caricature. This article will teach you some of the best caricature carving techniques.
The first caricature that Fred made was called 'Aristocrats of the Roads'. It showed two men-wanderers. It was made from Honduras Mahogany. Fred entered the piece in competitions and received several awards. He also featured it in the Chipping Away Catalog. Fred created a second Luciano Pavarotti caricature in 2009. He won a Second Runner up Award at a national woodcarving convention.
Eyes
Carving caricatures requires that the eyes be realistic. A caricature with realistic eyes is acceptable, but it can be frustrating for the viewer if the detail is not sufficient. You can take a photo of an existing carving and follow the steps to make sure your eyes match.
Next, the shape and size of the eyes must be determined. Some carvers work with the same shape of eyes as others. Others create more convincing eyes using different shapes. You can make your eyes symmetrical by using stop cuts to cut the lower eyelid. Next, you need to carve out the pupil as well as the iris. Once you've completed all of these details, it's time to move on with carving the caricature.
Safety
The wood carving caricatures are very unique. They tell stories without the use of words. Artists who create them take great pride in their accuracy. Caricatures can be described as representations of people and things that are exaggerated in order to convey an impression or satire. Wood carving carver Dave Stetson has established strict rules for carver safety and quality, as well as providing information for consumers.
First, clean the wood thoroughly and remove pencil marks. You can clean the surface with water or dish soap. The 60-degree V-shaped tools can be used to carve the neck. A 60 degree V-shaped tool, which cuts wood quickly, can be useful in carving. A good choice for this type of tool is the Ramelson 60-degree V-shaped carving tool, as it is sharp and easy to use.
Materials
The wire and wood caricatures are a fun, challenging way to carve animal figures. Although animal caricatures are not as detailed as human caricatures they can still be fun and tell a story without using words. Caricatures have a heightened sense of reality. While carving caricatures is a difficult hobby for beginners, it can be very rewarding for those who are more experienced.
You will need chisels as well as a board of wood to complete your carving. A hammer and chisels are also required. Acrylic white paint, which can be purchased at a craft store, is the first layer. After the base layer has been completed, you can start the second layer. This layer will include a golden brown color and a few drops (Academy) of burnt-sienna. To make the face, add 2 drops to 1 oz. of sunkissed pears.
FAQ
What is the main difference between plywood or particle board?
Plywood is made of layers of wood that are pressed together under pressure. Plywood can be cut to different thicknesses. It's commonly used as flooring and cabinets. Particle board is made from sawdust mixed with resin and then compressed into large blocks. It's often used for home renovation projects. Both types of boards are durable and easy to cut.
How much will it cost to get started?
There are no exact numbers because every project is different. These factors will help you get an estimate of how much money is needed.
-
Cost of materials
-
Tools and equipment
-
Time spent on the Project
-
Your hourly rate
-
What amount of profit can you expect to make?
-
It doesn't matter if your goal is to hire help
For those just beginning, it may be a good idea to start small with simple items like boxes and picture frames. You'll become more proficient as you get experience.
Where can I start woodworking?
You can learn the most effective way to build furniture by actually building it. While you will need tools and make mistakes, you will eventually master the art of building furniture.
Start by choosing a project you'd like to complete. It can be something as simple and small as a box, or large-scale as an entertainment center. Once you've decided on a project, find a local woodworker who specializes in that kind of work. Ask the local woodworker for help in deciding what tools and where to get them. You might even ask whether there's someone else you can talk to who does this kind of work.
What is the difference in a hobbyist and professional woodworker?
Hobbyists enjoy creating things out of wood. Professionals tend to focus on the quality. Hobbyists are proud of their creations and will often share them with family members and friends. Professionals will spend hours looking at designs before they start to build a project. They'll pay great attention to details, from choosing the most suitable materials to finishing the work perfectly.
What kinds of woods are good for making furniture?
Woods are classified based on their hardness. Softwoods include cedar, pine, cedar, and Cypress. Because they are resistant, they can be used for outdoor furniture. The hardwoods are oak, maple and mahogany. They're generally used indoors because they won't weather well outdoors.
Statistics
- Woodworkers on the lower end of that spectrum, the bottom 10% to be exact, make roughly $24,000 a year, while the top 10% makes $108,000. (zippia.com)
- If your lumber isn't as dry as you would like when you purchase it (over 22% in Glen Huey's opinion…probably over 10-15% in my opinion), then it's a good idea to let it acclimate to your workshop for a couple of weeks. (woodandshop.com)
- Most woodworkers agree that lumber moisture needs to be under 10% for building furniture. (woodandshop.com)
- Average lumber prices rose about 600 percent between April 2020 and May 2021. (familyhandyman.com)
External Links
How To
How to make wood joint
This tutorial will demonstrate how to join two pieces together of wood. We will use the "pockethole joint," which means that we drill holes in the wooden pieces and then glue them together. This method works great if your wood is straight and smooth. Dowel joinery might be a better option if your wood is not straight or flat. These are the steps
-
Drill Pocket Hole Joints. Measure and mark the location where you would like to place the pocket hole joint. With a handheld drill machine or jig saw, drill 3/4-inch deep holes in the ends of each piece.
-
Sand Smooth. Sanding the edges of the wood will help to prevent the joint from splitting later.
-
Glue both sides together. Apply glue to both sides of the wood. Let it sit for about 5 minutes before clamping the pieces together.
-
Clamp the Pieces Together. After the glue has dried completely, you can clamp the pieces together until they are flush.
-
Trim Joinery. Trim the excess wood around the joint after the glue has dried completely.
You should leave enough space between the pieces to allow you to turn them inside-out.