Whittling pencils are a great way to personalize your wood carvings, and this introductory guide shows readers how to create Santas, Leprechauns, and the iconic Uncle Sam using a variety of different tools. These pencils come with clear instructions and step-by-step photos, and the author includes tips on how to choose the proper micro-mini carving tools. He also provides tips for choosing the best pencil size and discusses basic painting and beards.
Dale Vander Linden
Dale Vander Linden (81) still makes pencils despite his years. He has been making them for more than 60 years and was even a US Navy veteran during the Korean War. Vander Linden is survived in death by his wife, Cherry Vander Linden (61 years), sons Stephen & JoAnne, as well as brother Pete. He was also preceded in death by his parents, Guy and Katie Vander Linden, and his brothers Ern, Don, and Keith.
Dale Vander Linden's whittling pencils
While carving his Santa Claus, Dale Vander Linden often uses rolling pins and pencils to create the Santa. At 81 years old, he spends the days leading up to Christmas carving the Santa Claus from pencils and other materials. Although many might be tempted by a toolkit for carving Santa Claus, he prefers to use his rolling pin.
Wood carving techniques
There are several different types of wood carving techniques that you can use to create your own unique pencils. Natural oils are one of the most common ways to finish wood carvings. These oils protect the wood from moisture and dirt, and they impart a sheen to the wood that helps the observer to read the form. Avoid gloss varnish. It creates a shiny and illegible surface that could confuse the viewer. Another technique is the use of wax, which gives pencils a soft, lustrous sheen. This is the best technique for indoor carvings.
The wood type that you choose should be based on the type of carving you plan to do. Choose a wood with fine grain and very little figure for detailed carving. A strong figure may interfere with reading fine detail. After you have selected the wood, it is time to choose the appropriate tools. You'll need safety goggles and Kevlar work gloves. These will protect the hands from wood chips, and prevent you scratching the wood.
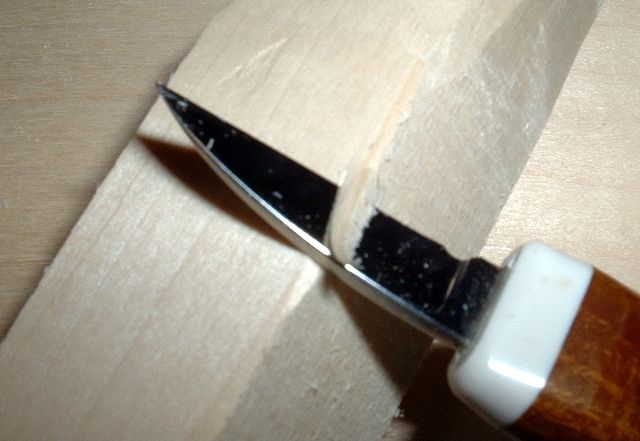
sanding edges of whittling and pencils

Wood carving is a popular form of decoration. This method typically involves carving a wooden plaque or tablet. These pencils can be sanded to improve the appearance and feel of the final product. These pencils can be used for any purpose, no matter what. You must first sand these pencil edges to achieve a smooth, sharp surface.
Start by making divots into the graphite base. You can now use a number-2 pencil to make the marks once you've completed that. Repeat the process until you are satisfied with the appearance and feel of your pencil. After you've completed the carving process, hot-melt adhesive can be applied to the pencil tip.
FAQ
What tools should I start with when becoming a woodworker?
Woodworking requires patience and practice. It takes time and practice to master the various techniques and tools required for woodworking.
There are many different types of woodworking equipment available on the market today. Some prefer power tools while some prefer hand tools.
You have the freedom to choose what tool you want, but it is important that you select the right tool for your job. If you don't have any experience, you may consider starting with a basic set of hand tools.
You might also want to learn how a router works, which allows you to cut wood into intricate shapes. These routers can be purchased at most hardware and home improvement stores.
What types of woods are best for furniture making?
Woods are classified according their hardness. Softwoods include cedar and pine as well as cedar and cedar. They're often used for outdoor furniture because they don't rot easily. You can find hardwoods like oak, maple, mahogany, teak, and others. They are generally indoors as they don't weather well outside.
What kind wood should I use for my project?
Woodworking is a popular job that involves oak, pine and maple. Every type of wood is different and can have a unique look and feel that will affect the final product. Oak, for example, tends be darker and more hard than other woods. Birch is lightweight and soft while mahogany is heavier and denser. You can also choose between solid wood and veneers. Veneers are thin sheets or wood that are glued together into one layer.
Where do I start with woodworking?
Learning how to build furniture is the best method. You'll need tools, and you'll have to make mistakes along the way, but if you keep at it, you'll eventually figure out what you're doing.
Choose a project that interests you. It can be as simple as a small box, or as complex as a complete entertainment center. Once you have chosen a project, locate a local woodworker who is skilled in this kind of work. Ask your local woodworker to help you determine the right tools for you and where they are located. Maybe you can ask the person if they know of anyone who does this sort of work.
Is it necessary to be a genius in woodworking to succeed?
No. No. Woodworking isn't rocket science. Anyone can learn to use basic powertools and techniques to create beautiful work of art.
Statistics
- Average lumber prices rose about 600 percent between April 2020 and May 2021. (familyhandyman.com)
- If your lumber isn't as dry as you would like when you purchase it (over 22% in Glen Huey's opinion…probably over 10-15% in my opinion), then it's a good idea to let it acclimate to your workshop for a couple of weeks. (woodandshop.com)
- The U.S. Bureau of Labor Statistics (BLS) estimates that the number of jobs for woodworkers will decline by 4% between 2019 and 2029. (indeed.com)
- The best-paid 10 percent make $76,000, while the lowest-paid 10 percent make $34,000. (zippia.com)
External Links
How To
How to stain wooden surfaces
Staining wood can be described as a process where chemicals are applied to the wood surface. This causes the wood to take on a new color. The wood will turn from white to brownish-red due to the chemical reaction. Although oak is the most popular type of wood to stain, there are many other types that can be used.
There are many methods to apply stain to wood surfaces. Some methods include mixing the stain along with a solvent like turpentine and then applying the mixture to the wood by brushing or spraying. Some methods involve a mixture of water and dye that is applied directly to the wood. The stain can be mixed with paints and varnishes to become part of the final coating.
Preparing your wood for staining is the first thing to do. You must clean the wood well to remove any grease or dirt that might interfere with the application of the stain. Sanding can smoothen out scratches and uneven spots. Next, you need to decide which stain you want. There are two basic kinds of stains: penetrating stains and non-penetrating stains. Penetrating stains penetrate deeper into the wood than non-penetrating ones, making them ideal for dark colors such as mahogany. Light colors such as maple work well with non-penetrating stain.
After you've decided what type of stain to apply, get ready for your tools. The best tool for applying stains is a paintbrush. It allows you to evenly distribute the liquid over the surface. A few rags are also handy to clean up any spillages after you have finished painting. If you plan on mixing the stain yourself make sure that you have enough containers to hold the different components.
After you have prepared your materials for staining, clean the area. To remove dirt and dust, use warm water and soap. Wipe the entire piece of furniture with a rag dampened with clean water. Take care to remove all debris and dirt, especially if you are planning on staining darker wood.
Next, spray the stain. Apply the stain by brushing or spraying it onto one side of the furniture. Slowly and carefully work your way along the grain to reach the opposite end. Make sure that the stain does not drip off the edge of the wood. Before you proceed with the next steps, let the stain dry completely.
To protect the painted surface, apply a coat of clear polyurethane sealant. Three coats of polyurethane sealing agent are required. Let the third coat dry overnight before you sand the final coat.