
Scroll saws make great crafting tools, but if they aren't used correctly, it can lead to frustration. Learn the basics before buying your first scrollsaw. The following article will teach you how to choose the right blade, stack cut pieces, and change blades. This will show you how to use your scrollsaw to create the best things. You can also contact me if you have questions.
Safety precautions
Safety procedures when operating a scroll saw are simple and important. Safety glasses are a must. Wear tight-fitting clothes and keep your hair neat. While operating the scroll saw, avoid wearing jewelry and rings. Understand and follow the machine's controls and guards. Also ensure the table is level. Also, please be careful while operating the scrollsaw.
One of the most common safety practices for scroll saws is to use a bench brush. A bench brush will clean the blade and table. You should also ensure that the blade is sharp and secure. A bench brush is not necessary if you don’t own an aquarium pump. An aquarium air pump can be purchased relatively cheaply at a local pet store or garage sale. Another good safety practice for scroll saws is to keep the blades oil-coated to prevent rusting. The same rule applies to the blades: dry wood will wear down the blades more quickly.
Choosing a blade
Although choosing a blade to use with a scrollsaw is not an easy task, there are some things that you need to keep in mind before you embark on your first project. Many scrollsaw users will try multiple blades before choosing the best one. There are two types: pin end and pinless blades. You can find out more in the Scrollsaw Woodworking and Crafts forums. For some helpful tips and tricks, check out the Scrollsaw Woodworking and Crafts Forums.
It is important to assess the complexity of the cut before purchasing a scroll saw blade. Larger, more intricate patterns require a thinner blade than those with smaller, simpler patterns. These cases will require a thinner blade. A narrower, thicker blade works better for more complex patterns. For the right blade thickness, make sure to read the universal code.
Changing blades
It is simple to change the blades on a scroll-saw, but it is important you read the instructions. These instructions will be provided in the user manual and online instruction manuals for scroll saws. These manuals are usually free to download. Before you replace the scroll saw's blades, unplug your power source. Loosen the two screws on the blade mounts and then remove the old blade. After removing the blade, tighten your mounts and replace it with the new one.
First, take out the insert from the table. You should remove any safety equipment or guards that may be attached before you try to change the blade. If the blade mount cannot be removed, you will need to remove it with the provided thumb screws. The blade is normally installed with the teeth facing upwards. However, there are blades that have teeth facing both directions. Follow all instructions in your scrollsaw manual.
Stack cutting
Stack cutting, a common scroll saw technique, allows you to cut multiple layers from thin stock. Stack cutting involves wrapping each piece with tape and drilling holes in the stacks. This technique results in multiple finished projects. It depends on what type of scroll saw you use, but this technique works well for basic ornament patterns. A router can be used to cut multiple layers simultaneously for more complicated projects.
A constant tension scroll saw can make turns in metals that are slightly larger than the blade's diameter. A machine is not capable of cutting perfectly square corners in just one pass. The outer corner can be cut in either a diagonal or in a different direction. This results in a clean edge that requires minimal sanding. A constant tension scroll saw can be used to cut outside corners but not sharply.
Use a scroll saw

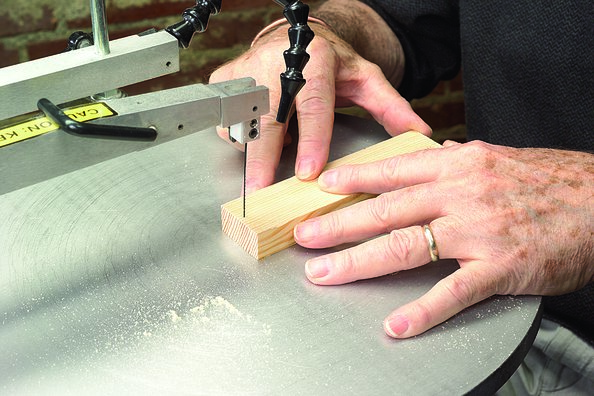
You must be able to safely use a scroll saw before you can use it. This tool is not as precise as a regular saw. Instead, you should use it slowly and steadily. A good rule of thumb is to go slowly and split lines as you go. When you are done cutting your material take the piece out and clean it up. Below are some tips to ensure you use a scroll saw safely.
First, ensure you have the right material to use the scroll saw. Make sure your workpiece is large enough to accommodate the blade. The blades could be damaged if the workpiece is not thick enough. The scroll saw can be used to cut a pattern. You can also use general purpose spray adhesive for adhering the photocopy on the wood. You must drill a hole into the workpiece if you want to cut straight lines using the scroll saw. This will ensure that the blades do not get stuck in the material.
FAQ
What is the minimum amount I will need to start?
Each project is unique so there aren’t exact numbers. These are the factors that will give you an idea of how much you'll need.
-
Material cost
-
Tools and equipment
-
Time spent on the project
-
Hourly rate
-
What is your expectation for profit?
-
No matter if you are looking to hire someone
It's a good idea for beginners to start with small projects like frames and boxes. As you gain more experience, you will be able tackle more complicated projects.
Are there any other things I should know regarding woodworking?
It's easy to underestimate the amount of work involved in making furniture. Finding the right kind of wood is the most difficult part. There are so many varieties of wood available that choosing one can be difficult.
A problem is that wood doesn't have the same properties. Some woods will warp over time, others will split or crack. You must take these things into consideration before purchasing wood.
How can you calculate the woodworking price?
The most important thing to remember when calculating costs for any project is to keep them as low as possible. Always make sure you get the best price on materials. It is also important to consider the costs of other factors, such time, skill, and experience. You can find an estimate of the cost of different woodwork projects in our guide to common DIY tasks.
What's the difference between plywood vs particle board?
Plywood is a combination of layers of wood, which are then pressed together under high pressure. Plywood can come in many thicknesses and is used for flooring and cabinets. Particle board is made up of sawdust mixed in resin, then compressed into large pieces. It's commonly used for home improvement projects. Both boards can be cut easily and are both durable.
Where can I buy woodworking supplies?
There are many places that you can find all the information you need. You could shop at your local hardware store or go online to Amazon.com.
You can also look for used furniture at flea markets or garage sales.
Statistics
- Average lumber prices rose about 600 percent between April 2020 and May 2021. (familyhandyman.com)
- If your lumber isn't as dry as you would like when you purchase it (over 22% in Glen Huey's opinion…probably over 10-15% in my opinion), then it's a good idea to let it acclimate to your workshop for a couple of weeks. (woodandshop.com)
- The U.S. Bureau of Labor Statistics (BLS) estimates that the number of jobs for woodworkers will decline by 4% between 2019 and 2029. (indeed.com)
- Overall employment of woodworkers is projected to grow 8 percent from 2020 to 2030, about as fast as the average for all occupations. (bls.gov)
External Links
How To
How to join two pieces of wood together without nails
Woodworking is an enjoyable hobby. Woodworking can be a fun hobby because you can work with your hands to make useful objects from wood. However, there are times when you want to join two pieces of wood together without having to use nails. This article will teach you how to do this to keep your woodwork projects looking great.
First, remove any sharp edges from the wood pieces before you join them. Sharp corners can cause problems down the line. Now it's time to start glueing your boards together.
When working with hardwood, glue should be applied only to one side. You should glue both sides if you are working with softwoods such as pine and cedar. Press the boards down until the glue is fully incorporated. Be sure to let the glue dry before you move on to the next step.
After you have glued the boards together, drill holes in the joints where you intend to place screws. These holes will differ depending on the type and size of screw you are using. If you plan to use a 1/2 inch wood screw, drill a hole at least 3/4 inches in depth.
Once you have drilled the holes, the next step is to drive your screws through the joint into the board's backside. Be careful not to hit the front surface of the board, or else you'll ruin the finish. Don't drive the screws too far into the end. This will avoid splitting in the wood's ends grain.
Now that your project is finished, you'll want to protect it from the elements. You can either seal the entire piece of furniture or cover the top. It doesn't matter what method you use, you want something that will last many years. Examples include oil-based varnishes and polyurethanes, shellac, lacquer and others.
These products can be found in most home improvement shops. Make sure you get the right product for your job. Some finishes are toxic and should not ever be used indoors. Wear protective gear whenever you are handling them.