There are many things to consider when choosing an oar carving blade. You should also consider the size, sharpness and stagbone of your knife as well as lamination and origins. Learn how to choose the best one for you. This article will give you an idea of the things to look out for when buying your new oar cutting knife.
Size
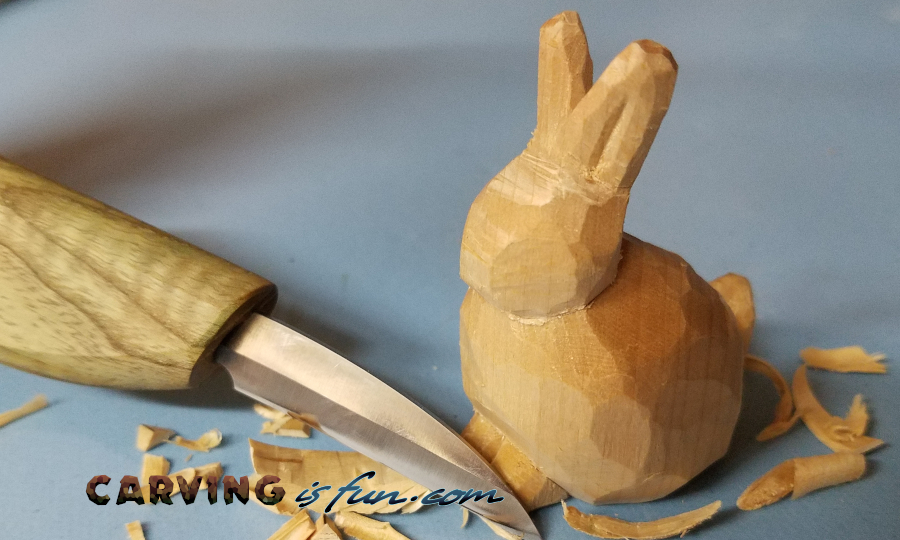
Oar Carver pocket knives are the best examples of this art. There are three sizes in the current lineup. Version 2 is larger, with a thinner blade. Version 3 features a thicker edge and a wider gap. These are some suggestions to help you choose the ideal size.
Sharpness
The sharpness of an oar carving knife's edge is one of its most important attributes. Its edge will show signs of wear, including dullness, chips, and nicks, so it's essential that you keep a sharp knife. It's easy to check the edge of an oar-carving knife and determine its sharpness. A magic marker will help you match the angles of each knife's blade to its center.
You can test the sharpness by cutting a piece from basswood across its ends grain to determine if it is. A blade should not leave any marks or ripples when cutting through wood. Smooth cuts are like cutting the bottom of a baby without leaving any marks. If the blade leaves any marks, it may not be sharpen enough to carve. It's essential to check the sharpness of an oar carving knife regularly.
Laminated blades
The Oar Carver series was designed by Ross Oar, a world-renowned carver, and has been a timeless example of the carving pocket knives. Currently, there are three models, Versions 1, 2 and 3. Each version differs from the other. Version 2 has a wider gap between the blades. It also has a thinner edge. For more information, see the Oar Carver blade guide.

Mora makes two versions of the 106 and 120. Both models are made with a laminated steel blade, but the Mora knife is longer. Each knife has a basic oval handle. Both knives also come with snap sheaths. Another model is Mora Frost 122. It has a blade made of laminated carbon steel and a hardness of 61 Rockwell. This is a great knife for carving, and the blade is sharp and durable.
Origins
Originating in Japan, the oar carving knife has been around since ancient times. It is made of solid hardwood and has a narrow circumference, while the handle is four and a half inches long. The oar has a long, flat blade, with a flat tip. The knife's shaft measures 53 inches in length. The handle is made from a narrow, slender circle. The shaft and blade are separated by a thin slice of wood.
Although the oar was the first known carving tool, its history is longer. The oar was originally designed to be used by riverine and coastal people. Because the Admiralty recognized the symbol easily and it was widely used, they chose the oar. Other meanings might have been given to the oar, however. Below are some examples of its origins. If you're interested, they can also be useful if your are curious about the history knife-making.
FAQ
What time does it take for furniture to be finished?
It depends on what size piece of furniture you have. For smaller projects such as picture frames and boxes, it can take less than a day to complete. Larger projects like tables and desks take many days. It takes time in order to properly stain or seal the wood.
Can this be a way to make money?
Yes! Many woodworkers are already doing so. According to the U.S. Bureau of Labor Statistics in May 2012, the median annual income for woodworkers was $34,000 That's higher than the national average of $31,000 per year.
What type of tools does a carpenter use?
Carpenters most often use a tool called a hammer. A hammer helps to carpenter pound nails into the wood. It also helps them hold pieces together while they are working on a project. Other tools include clamps and pliers, screwdrivers as well as measuring tape, pencils and saws.
What's the difference between plywood vs particle board?
Plywood is made of layers of wood that are pressed together under pressure. Plywood comes in several thicknesses and is commonly used for cabinets and flooring. Particle board is made from sawdust mixed with resin and then compressed into large blocks. It is used primarily for home improvements. Both boards are strong and can be easily cut.
Where can you find free woodworking blueprints?
Free woodworking plans are available online. You don't even need to buy books or magazines. You just need to search Google. You can search Google for "free woodworking" and hundreds of websites will appear allowing you to download plans.
Statistics
- Overall employment of woodworkers is projected to grow 8 percent from 2020 to 2030, about as fast as the average for all occupations. (bls.gov)
- The U.S. Bureau of Labor Statistics (BLS) estimates that the number of jobs for woodworkers will decline by 4% between 2019 and 2029. (indeed.com)
- Most woodworkers agree that lumber moisture needs to be under 10% for building furniture. (woodandshop.com)
- In 2014, there were just over 237,000 jobs for all woodworkers, with other wood product manufacturing employing 23 percent; wood kitchen cabinets and countertop manufacturing employing 21 percent. (theartcareerproject.com)
External Links
How To
How to stain hardwood
The process of staining wood involves the application of chemicals to the wood's surface, which causes it to change its color. This chemical reaction causes the wood color to change from white and brownish red. Oak is the most commonly used wood for staining, but other woods can also be stained.
There are several ways to apply stains to wood surfaces. Some methods include mixing the stain along with a solvent like turpentine and then applying the mixture to the wood by brushing or spraying. Other methods use a solution of water and dye applied directly to the wood. Stains can also be mixed into paints and varnishes, becoming part of the finish coating.
Preparing the wood surface is the first step to staining it. To apply the stain, clean the wood completely. Sanding smoothens any scratches or rough spots. You must then decide on the type of stain that you wish to use. There are two types of stains that can be used: penetrating and non-penetrating. Penetrating stain penetrates deeper into wood than nonpenetrating, making them suitable for dark colors like mahogany. The best non-penetrating colors are those that work with light colors like maple.
After deciding on the type of stain, you want to apply, prepare your tools. You can use a paintbrush to apply stains. This allows you spread the liquid evenly over the surface. It is a good idea to have rags on hand in case you need them to clean up any stains that may remain after you have finished painting. You should have enough containers to store the various components of the stain mixture if you intend to mix it yourself.
After you have prepared the materials, you can clean the area where you want to stain the wood. Use soap and warm water to remove dust and grime. Use a dampened rag and clean water to wipe the furniture. Take care to remove all debris and dirt, especially if you are planning on staining darker wood.
The stain should be applied next. Next, apply the stain to the furniture by starting at one end. Slowly and carefully move along the grain of wood, slowly but steadily, until you reach the other end. You must be careful not to allow the stain to drip off the wood's edges. Allow the stain to dry completely before you move on to the next step.
Apply a clear polyurethane sealant to protect the painted surface. Apply three coats polyurethane sealer. Allow the third coat, which should dry overnight, to dry before sanding.