
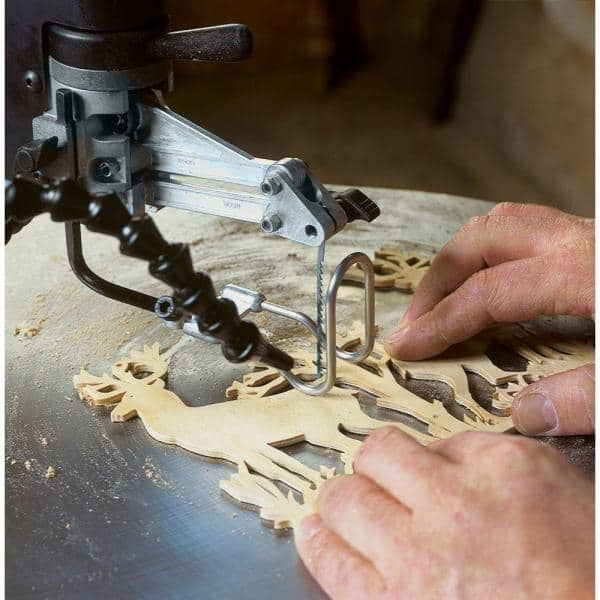
A scroll saw shadow box is an excellent way to display artwork or photographs. A shadow box of small size can give a sense of wonder. One simple scene can be created from seven layers 1/4" Baltic Birch plywood. It measures approximately 4 inches square and 1.75 inch thick. You can add small details to give the piece an extra dimension and intrigue. An increase in the size of a shadowbox would require more detail and make it more difficult. This is the scene inside the shadow box.
Shop Fox Classic fence
A scroll saw shadow box can be built using a variety of fences. There are many choices, including the T Shape Shop Fox Classic fence and the T Slot fence. Shop Fox Classic fences have a quick-release knife guard and riving blade system. They are prewired for normal 120V 20A circuits.
Shop-Fox Classic fencing is a great choice for your next project. This fence is built to last for many years. The pattern options include the Five Layer Circle Art Scroll Saw Pattern (with a Duck Family Tray Scroll Saw Pattern), the Hanging OrganizerBox and the Four-Layer Jesus Cross. Each pattern includes a video tutorial which will guide you through the process.
Fox Aluma-Classic fence
Shop Fox Aluma Classic fence is a T shape accessory fence that can be used with any shop-made scrollsaw. The fence's ease of adjustment makes it possible to cut even the largest panel with ease. Prewired to work on an ordinary 120V-20A circuit, the fence has a 10-inch, 40T carbide tip blade.
Fox Original Fence
Shop Fox Original fences for scroll saws come with a prewired, T-shape blade guard and riving tool system. The riving knife system is included and the blade comes with a carbide-tipped 10" x 40T blade. If you're new to scroll sawing, you might want to start with a small project, such as a shadow box.
FAQ
How do I organize my shop?
A designated place to store your tools is the first step towards keeping your workshop clean. You want your tools to stay clean and free from debris and dust. Hang tools and accessories using pegboard hooks.
Can I refinish furniture that I make?
Yes! There are plenty of ways to refinish old pieces of furniture without having to pay a pro. Here are a few ideas:
Sandpaper can be used to remove stains and scratches. Finally, use a clean cloth or sponge to clean the surface.
Apply clear polyurethane finish. Let dry completely before moving furniture around.
Use acrylic paint to paint furniture.
Instead of painting, use stain. You can give your furniture a rich appearance with stain.
Shellac wax can be applied. The wax will add shine to the wood and protect it.
What is the difference of plywood and particleboard?
Plywood consists of layers made from wood and pressed together by pressure. Plywood comes with a range of thicknesses, and it is most commonly used for flooring and cabinets. Particle board is made of sawdust and resin that has been compressed into large blocks. This board is commonly used in home improvement projects. Both types of boards are durable and easy to cut.
Where can I find my woodworking tools?
There are many places that you can find all the information you need. You could go to your local hardware shop or visit websites such as Amazon.com.
You can also look for used furniture at flea markets or garage sales.
Do you have any tips on starting a woodworking business?
It's not easy to start your own woodworking business. You won't mind working hard if your hobby is something you love. You'll enjoy the challenge and rewards of owning your own business.
It is important to remember that unexpected problems may arise when you start a new venture. You might run out money, or you may have to borrow unexpectedly. You might find customers not willing to pay the amount you expected. These situations are necessary for survival.
One tip is to have a separate banking account for your company. This way, you'll always know exactly how much money you have coming in.
What amount of money do I need to get started with my business?
Each project is unique so there aren’t exact numbers. But if you want to get an idea of how much money you'll need, consider these factors:
-
Material cost
-
Tools and equipment
-
Time spent working on the project
-
Hourly rate
-
How much profit do you expect to earn
-
It doesn't matter if your goal is to hire help
It's a good idea for beginners to start with small projects like frames and boxes. You'll become more proficient as you get experience.
Statistics
- If your lumber isn't as dry as you would like when you purchase it (over 22% in Glen Huey's opinion…probably over 10-15% in my opinion), then it's a good idea to let it acclimate to your workshop for a couple of weeks. (woodandshop.com)
- The best-paid 10 percent make $76,000, while the lowest-paid 10 percent make $34,000. (zippia.com)
- Average lumber prices rose about 600 percent between April 2020 and May 2021. (familyhandyman.com)
- Most woodworkers agree that lumber moisture needs to be under 10% for building furniture. (woodandshop.com)
External Links
How To
How to make wood joints
This tutorial will teach you how to join two pieces wood together. We'll use the "pocket hole joint," which means we drill holes in the wood and then glue them together. This method is great if your wood's straight and smooth. You may want to consider other methods, such as dowel joining. These are the steps
-
Drill Pocket Hole Joints. You will need to measure and mark the exact location of your pocket hole joint. You will then drill 3/4" deep holes through each piece of wood with a jigsaw, handheld drilling machine, or hand-held drill.
-
Sand Smooth. Sanding the wood's edges will help ensure that the joint won't split later.
-
Glue Together Apply glue to the sides of both wood. Let the wood sit for 5 minutes, then clamp it together.
-
Secure the pieces together. Once the glue has dried, clamp the pieces together so they are flush.
-
Trim Joinery. Trim the excess wood around the joint after the glue has dried completely.
You should leave enough space between the pieces to allow you to turn them inside-out.