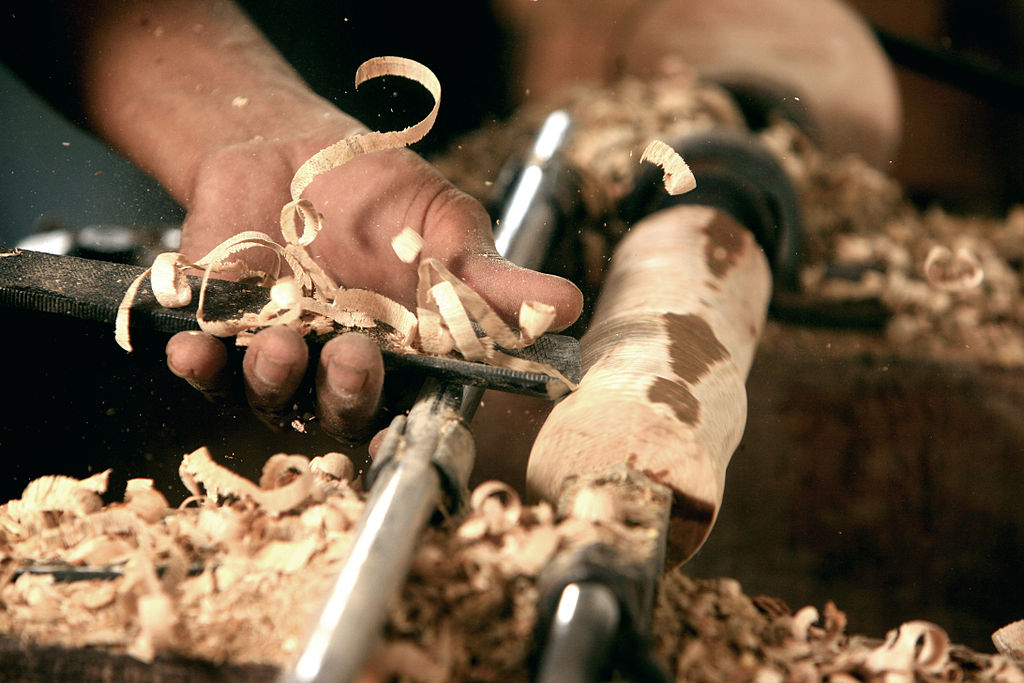
We will be covering the various techniques and materials involved in woodturning inlay. Learn how to make a mortise, inlay and upcut using a rotary tool handpiece. You can read on for more details. Try it! This simple yet rewarding project should be a joy! Woodturning projects are incomplete without inlay.
Techniques
Inlay techniques can play a significant role in a woodworking project. They can add character and beauty to the finished product, as well as enhance its aesthetic appeal. There are many methods to create beautiful inlays. Each of these has its own advantages. This article will show you the many options. Continue reading for more information! First, prepare the wood. Use a paper towel or damp rag to clean the wood. To get rid of dirt and other residue, mild dish soap may be used. Use chemicals with care as they can cause damage to the wood. You might also consider hand tools for removing wood.
Inlay techniques can be applied to other materials. Examples of inlay materials include wood, metal, and stone. Inlaid pieces can create a stunning contrast image when applied correctly. There are many types of inlay tools, such as knives, jigs and fixtures that hold the inlayed pieces in their place. You can inlay the wood before or after it is turned. Once you've turned the piece, you can add inlay materials to the top or bottom.
Materials
A wide range of inlay material options can be used to enhance the visual appeal of your object. Inlay materials are able to be used to cover many different types of recesses. In some cases, inlay materials can also be used to cover brad nail or screw head locations. These steps will help you create stunning inlays.
The first step in making an inlay design is to choose the material. Certain materials are better suited to this purpose than other. People may feel more comfortable using resin inlay, which doesn't require you to cut intricate pieces or fill in gaps after mortises were made. Additionally, resin is available in many colors, which can be magical at times. These are some tips on how to use resin for inlay.
Installation
Inlay work is a decorative element that is applied to turned wooden objects. Ron Hampton has detailed instructions that will help woodturners install inlays. He walks you through the installation of inlays on bottoms, tops and bowls. He explains safety guidelines and the importance of precision in the process. This technique adds a unique touch to the wood turnings. Woodcraft has a wide selection of inlay bandings.
Woodturning inlay requires that you prepare the base piece of wood to be installed. A plunge router is the best choice for the best results. Attach the template guidance to the router base. Push the bushing into the appropriate position around your guide collar. Place the inlay on the base and ensure it is flat. It will be easier for you to install the inlay because of its angled edges. A router that has a bit slightly larger in size than the mortise will make it easier to install the Inlay.
Maintenance
Care and maintenance of woodturning inlay involves a few simple steps. Before putting your inlay in your woodturning project, you need to clean it thoroughly. This is especially important for those using CA glue in stone inlay. A 3/16" allen wrench can be used to measure the inlay's depth if you have limited space. Sand your inlay down to 120grit. This will prevent scratching.
FAQ
What's the difference?
Hobbyists are passionate about making things from wood, while professionals tend to be more focused on the quality and craftsmanship of their work. Hobbyists usually take pride in their creations and often share them with friends and family. Professionals spend hours researching design ideas before starting to work on a project. They'll be meticulous about every aspect of their work, from choosing the best materials to finishing it perfectly.
You can learn how to woodwork.
You can learn everything best by doing. Woodworking is an intricate art form that requires practice, skill, patience, and experience. Mastering any craft takes time.
You can learn the most effective way to master a skill is by actually doing it. Start small and then build upon what you've learned.
Where to Buy Hardwood Lumber?
Home Depot can sell hardwood lumber. They sell all kinds of wood products, including flooring, cabinets, furniture, etc.
A large variety of engineered hardwoods is available to them, including Ipe (Araucaria Angustifolia), Brazilian Cherry and Peau d'Arco.
These woods are available online by searching Google for "hardwood lumber".
What kind of tools are used to carpenters?
Carpenters use a hammer as their most common tool. A hammer can be used to drive nails into wood. This helps to keep pieces together when they are working on a project. Other tools include clamps.
Do you have any tips on starting a woodworking business?
It's not easy to start your own woodworking business. But if you're passionate about your hobby, you won't mind putting in the effort. You will probably love the challenge of starting your own business.
Remember that you may encounter unexpected problems when starting a new venture. For instance, you might run out of money unexpectedly. Perhaps customers won't pay you as much as you had hoped. Preparedness is key to survival in such situations.
A good tip is to open a separate bank account for your business. You will always know how much money you have coming in.
How do I get started as a woodworker?
Woodworking is an art that takes patience and practice. It takes time for you to master the different techniques and tools that are required to woodwork.
There are many types of woodworking equipment on the market today. Some prefer power tools while some prefer hand tools.
You have the freedom to choose what tool you want, but it is important that you select the right tool for your job. A basic set of hand tools may be enough for you if your skills are not yet developed.
Another option is to learn how to use a router, which is used for cutting intricate shapes into wood. These can be found at most hardware shops.
How do I identify the type of wood that I am dealing with?
Always verify the label on wood purchases. The label should detail the wood species, its moisture content and whether it has been treated or not.
Statistics
- Most woodworkers agree that lumber moisture needs to be under 10% for building furniture. (woodandshop.com)
- Overall employment of woodworkers is projected to grow 8 percent from 2020 to 2030, about as fast as the average for all occupations. (bls.gov)
- Average lumber prices rose about 600 percent between April 2020 and May 2021. (familyhandyman.com)
- The best-paid 10 percent make $76,000, while the lowest-paid 10 percent make $34,000. (zippia.com)
External Links
How To
How to join wood with no nails
Woodworking is a favorite hobby. Woodworking can be a fun hobby because you can work with your hands to make useful objects from wood. You may need to join two pieces without the use of nails. This article will help you to maintain the beauty of your woodwork projects.
You will first need to trim the edges of your wood pieces before joining them. You don't want any sharp corners to cause problems later. Once you've done this, you're ready to start gluing your boards together.
When working with hardwood, glue should be applied only to one side. If you are using softwoods such pine or cedar, glue should only be applied to one side. After applying the glue, press the boards firmly until they are completely stuck together. Make sure you let the glue dry before moving on to the next step.
After you've glued your boards, you'll want to drill holes into the joints where you plan to insert screws. Depending on what type screw you choose, the size of these holes will depend on how big they are. For example, if you intend to use 1/2-inch wood screws, you need to drill a hole that is at most 3/4 inches deep.
Once you have drilled the holes, the next step is to drive your screws through the joint into the board's backside. Do not hit the boards' front surfaces. It will ruin the finish. Don't drive the screws too far into the end. This will help prevent splitting of the end grain.
Once your project is complete, it's time to protect it against the elements. To do this, you can seal the entire furniture piece or just cover the top. It doesn't matter what method you use, you want something that will last many years. Examples include oil-based varnishes and polyurethanes, shellac, lacquer and others.
These products can usually be found at any home improvement store. It is important to ensure that you purchase the correct product for the job. Keep in mind that certain finishes can be toxic and should not be used indoors. Wear protective gear whenever you are handling them.