A bowl gouge can be used to carve or smoothen the bowl's surface. Its size and shape determine the type of work you can perform with it. Instruction leaflet comes with your gouge. It includes a forged tip that allows you to make small cuts inside and outside of a bowl. It also features a balance edge and edge to aid in fine projects. It is made from high-quality steel.
Shape
A bowl gouge, a sharp tool used to shape bowls, is an extremely useful tool. It's made of wood and can be quite expensive. You can purchase a gouge from the home center for a few dollars. This wood is very forgiving. It requires several exterior cuts as well as a hollowing cut. You might want to start bowl making by using a 2x6 basic piece. Because it is inexpensive and easy to use, this is a great option for beginners.
There are many shapes of bowl gouges. The basic bowl gouge measures 5/8 inches in diameter. A 3/4 inch gouge measures slightly larger. However, larger tools can often be more efficient but do not always mean that they are more effective. It is important to try different sizes and gouges until one works best for you. Every turner has a preferred grind. You should experiment with various tools until you find the one that works best for them.
Size
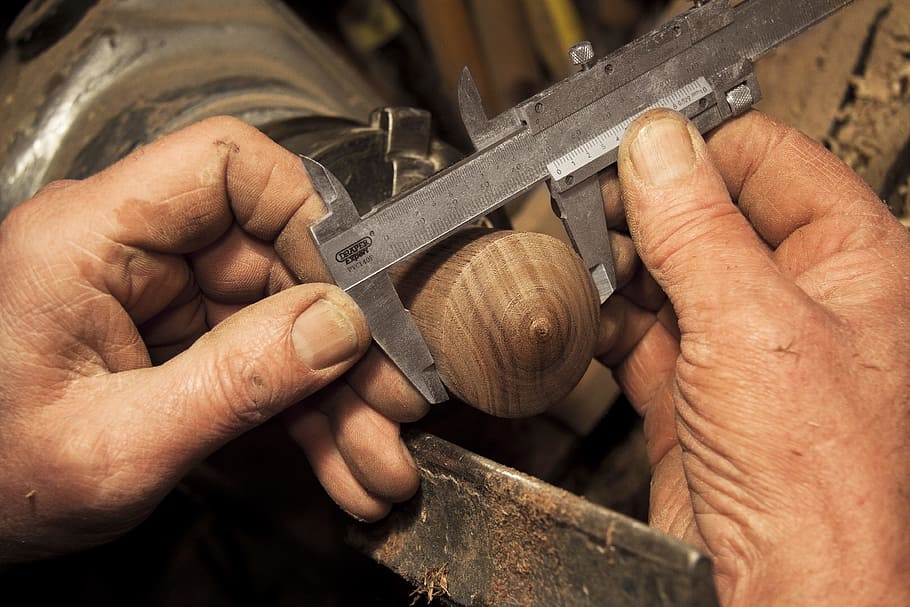
There are two basic systems used to size bowl gouges. English and North American systems determine the size of gouges by their diameters and flute width. A 1/2" gouge is marked in one system, while the other system uses 5/8” and 1” diameters. This difference in measurements makes the gouge more precise, and can help you choose the right size for your lathe. Before you choose the appropriate bowl gouge, measure the bowl. Then, decide the appropriate size based upon the size and flute of the gouge.
A larger bowl gouge has many advantages, but they are heavier and more bulky than smaller ones. A smaller bowl gouge is better for beginners. You can increase the size of your bowl gouge gradually. For more skilled woodworkers, it is a good idea to limit yourself to one size. Once you master your woodworking skills, you can invest in larger bowl gouges if you wish. Although they are harder than stainless steel, carbon steel bowl gouges require more maintenance than their stainless counterparts.
Function

A bowl gouge has two functions. It prepares the bowl's outside surface for sanding. The tool rest holds the left wing pivoting on the gouge. The cutting edge touches the wood when the handle is raised. The cut then moves away from the wood, revealing a smooth, ready-to-sand surface. A bowl gouge is secondarily equipped with a single cutting edge, the bevel.
A bowl gouge’s bevel angle can vary anywhere from 40 to 45°. This can vary depending on what circumstances are at play. Large bevel angles work best when turning large bowls. Then, smaller angles can be used for cutting beads and spindles. The best angle to use depends on the purpose of your tool. It can be hard to achieve a good bevel angle without damaging the wood.
Handle
For support and control of the bowl's curvature, keep the bowl gouge handle close to your body while cutting it. Swing the handle to create a convex curve in the bowl, while holding the tool rest firmly with the left hand. You can adjust the height of the tool-rest to achieve the desired depth or width. A sharp gouge can cut through the bowl up to an inch at a stretch, depending on the size and shape of the bowl.
A bowl gouge has a bowl-shaped shaft made from a rod of steel that is then machined into the desired shape. It often has a concave area or flute that is hollowed out during milling. Handles made of hardwood are common for bowl gouges, but there are many other materials. Some bowl gouges have large handles to make it easier for you to cut large areas.
FAQ
How much money do you need to get going?
Each project is unique so there aren’t exact numbers. But if you want to get an idea of how much money you'll need, consider these factors:
-
Materials cost
-
Tools and equipment
-
Time spent on the project
-
Hourly rate
-
What profit are you expecting to earn?
-
No matter if you are looking to hire someone
If you're just starting out, you may decide to start small by making simple items such as boxes and picture frames. You will gain more experience and be able to tackle larger projects.
Is it necessary to be a genius in woodworking to succeed?
No. No. Woodworking isn't rocket science. It is possible to learn basic tools and techniques that will allow you to create beautiful art.
How can I determine which tools are most suitable for me?
When shopping for tools, it helps to think about your needs and preferences. Do you prefer metal handles or plastic? What size screws and nails do you use most often? Would you rather use hand tools than power tools?
What woods are suitable for making furniture?
Woods are classified according their hardness. Softwoods include cedar, pine, cedar, and Cypress. They're often used for outdoor furniture because they don't rot easily. You can find hardwoods like oak, maple, mahogany, teak, and others. Because they can't weather outside, they're usually used indoors.
How do I know what type of wood I'm dealing with?
Always inspect the label when buying wood. The label should provide information about the wood species, moisture content, and whether preservatives have been used.
How can I learn basic woodworking skills
It is an excellent way to learn how to build furniture. You can make a simple bench yourself. You can do this project using any type of wood you have on hand at home. If you're not sure which kind of wood to choose, you can purchase cheap pine boards at Lowes and Home Depot. You'll need to sand the bench after it's built. Then, finish it with varnish or a stain.
Statistics
- Most woodworkers agree that lumber moisture needs to be under 10% for building furniture. (woodandshop.com)
- In 2014, there were just over 237,000 jobs for all woodworkers, with other wood product manufacturing employing 23 percent; wood kitchen cabinets and countertop manufacturing employing 21 percent. (theartcareerproject.com)
- The best-paid 10 percent make $76,000, while the lowest-paid 10 percent make $34,000. (zippia.com)
- Average lumber prices rose about 600 percent between April 2020 and May 2021. (familyhandyman.com)
External Links
How To
How to stain wood
Staining wood refers to applying chemicals to wood's surface. This chemical reaction causes the wood to change in color. This chemical reaction changes the wood's color from white to brownish. Oak is the most commonly used wood for staining, but other woods can also be stained.
There are many options for applying stains to wood surfaces. You can mix the stain with a solvent, such as turpentine, and spray it onto the wood. Others use a solution made up of water and dye, which is then applied directly onto the wood. The stain can be mixed with paints and varnishes to become part of the final coating.
Preparing your wood for staining is the first thing to do. Clean the wood to get rid of any grease, dirt or other substances that might be detrimental to the stain's application. Sanding smoothens scratches and rough spots. The next step is to choose the stain type you want. Penetrating stains are different from non-penetrating. Penetrating stains penetrate deeper than non-penetrating stains, which makes them great for dark colors like mahogany. Non-penetrating oils work best when used with light colors, like maple.
After deciding on the type of stain, you want to apply, prepare your tools. Because you can spread the stain evenly with a paintbrush, it is ideal for applying them. A few rags are also handy to clean up any spillages after you have finished painting. If you intend to mix the stain yourself you will need enough containers to hold all the components.
Once you have prepared your materials, start by cleaning the area where you plan to stain the wood. Clean the area with soap and warm water to get rid of dirt and grime. Use a dampened sponge and warm water to clean the entire piece. Be sure to get rid of all loose material, especially if staining is planned for darker wood.
The stain should be applied next. The stain can be applied by spraying or brushing the stain onto one end of the furniture. Slowly and carefully move along the grain of wood, slowly but steadily, until you reach the other end. You must be careful not to allow the stain to drip off the wood's edges. Before moving on to the next steps, allow the stain drying completely.
A coat of clear polyurethane sealing agent is applied to protect the paint. Apply three coats of polyurethane sealer. Allow the third coat, which should dry overnight, to dry before sanding.