
It is crucial to properly tension the blade before setting up a bandsaw. There are many techniques involved, and the proper set-up will affect the final results of your cut. These steps will help you set up your band saw and get you cutting! Below are some tips to help maximize your bandsaw's potential. These tips may seem difficult at first but will pay off in the end.
A tension meter is used to set up a bandsaw
You can get the most consistent and accurate blade tension by using a tension gauge to set your bandsaw. Before you start cutting wood, you should read the manufacturer's instructions carefully. Depending on the saw model, some of these instructions may differ slightly. Turn the tensionwheel down 1/4 to 1/2 turn. After you have achieved this, adjust the blade guides to the recommended FSR.
A second way to check the tension on a bandsaw is to deflect your blade and listen for an audible tone. Tension meters are a precise and expensive tool that can adjust blade tension to ensure maximum blade life. A tension meter may cost $400 or more, but it is worth the price. If you're unsure whether you want to purchase a tensionmeter, you can always check the blade tension using a gauge.
You can check the blade tension by using a gauge
Setting up a bandsaw is crucial. Every blade needs the same tension to function properly. The amount of tension will differ according to the pulling force, which is generally between 200 and 800 pounds. A bandsaw's tension scale will give you an inaccurate reading if you don't use one. What can you do to correct this?

A bandsaw gauge is composed two stainless steel plates which pivot past each others and are connected using a tensioning Spring. One plate features a numeric scale, while the other has a pointer indicator. The gauge clips to the blade with three pins. Two pins are on either side of your blade, and the third pin is against the blade on one.
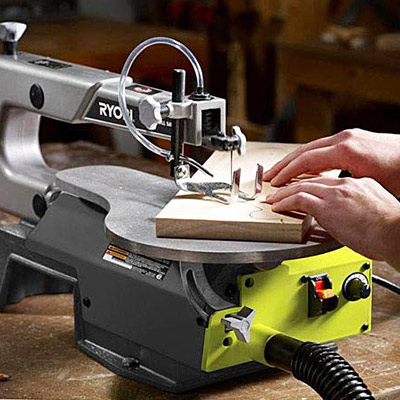
Tracking a blade
High quality cuts require proper blade setup. For a successful cut, it is crucial to have the blade set at the right height. You should set the blade height to allow for at least one-eighth to a quarter-inch clearance from your material. A blade that is too low or too high will result in excessive vibration and friction, which can cause a deviation from the line. Tracking knobs can be used to stabilize wobbling knives.
First, locate the blade. The blade should be positioned on the crown of your wheel. Its deepest part is in the middle of the gullet. Next, you need to tension the blade. The tracking control, located at the rear of the saw, should give you the tension. Once the blade is in a good position, lock the control. After you are happy with your position, you may begin cutting.
To reduce drift, use a long blade
Set up a bandsaw by placing the long blade near the center. Also, it should not be too close the wheel's rear or front edges. A blade running about an eighth-inch to quarter-inch off the center is normal. However, if your blade barely touches a wheel, you may need to adjust it. Adjust the fence to correct this and tilt the upper wheels.
The best way to account for drift when setting up a band saw is to use a long blade with the same toe-out angle as the blade you are cutting. This will decrease drift which is when material is lost as a wood cutter begins cutting the first piece of lumber. The video below will show you how to properly set the fence angle. You can also duplicate the fence angle with a jig.
Align the blade using a fence
To align the band saw blade, you can use a fence. Place the fence next to the fence so that the blade is parallel to it. Slide the fence along the miter slot, until the fence's face meets the miter. You can also use a finger or thumb to check the alignment of the blade in the miter slots.
Before you adjust the fence, make sure to set the blade guides. The band saw must be correctly set up. The fence must be in place with a sharp blade. You must adjust the fence to compensate for any drifting of the blade. You can measure the angle of drift with a jig or bevel square. This video will demonstrate how to do it. You should first determine which fence is causing drift.
FAQ
Can I refinish my own furniture?
Yes! There are many options for refinishing furniture that you don't need to hire a professional. Here are some examples:
Use sandpaper for removing stains and scratches. Then wipe down the surface with a clean cloth.
Use clear polyurethane varnish. Allow to dry thoroughly before moving furniture.
Use acrylic paint to paint furniture.
You can stain the furniture instead of using paint. The furniture will have a rich look thanks to the stain.
Apply shellac wax. You can protect your wood with wax and give it shine.
How much should a Woodworker Charge per Hour?
The hourly rate for a professional Woodworker will vary depending on many variables, such as experience, skill level and availability.
The hourly average rate for skilled woodworkers runs between $20-$50.
A less experienced woodworker may charge as little as $10 an hour.
Where can you buy your woodworking materials?
There are many places that you can find all the information you need. You can visit your local hardware stores, or you can look online at sites like Amazon.com.
For furniture and other materials that you can reuse, check out flea markets and garage sales.
What kinds of woods are good for making furniture?
Woods are classified according to their hardness. Softwoods include pine, fir, cedar, and cypress. They are great for outdoor furniture as they resist rot. You can find hardwoods like oak, maple, mahogany, teak, and others. Because they can't weather outside, they're usually used indoors.
What kind wood should I use for my project?
Oak, maple, cherry and mahogany are the most common wood types used for woodworking. Each wood variety has distinct characteristics that influence the final product's look and feel. Oak is a darker wood and tends to be more durable than other types. Birch is light and soft, while mahogany can be heavier and more dense. You also have the option of solid wood or veneers. Veneers can be described as thin sheets of wood that have been glued together in one layer.
Where can you find free woodworking blueprints?
You don't need to purchase any books or magazines to find free woodworking plans. You only need to Google search. Enter "free woodworking", and you will see hundreds upon hundreds of websites offering free plans.
How often should new supplies be purchased?
You'll probably have to replace some of your tools over time. Hand tools will need to be sharpened regularly. If you are using power tools, you will need to purchase replacement parts regularly. To avoid buying too much at once, try to spread your purchases out over a few months.
Statistics
- The best-paid 10 percent make $76,000, while the lowest-paid 10 percent make $34,000. (zippia.com)
- The U.S. Bureau of Labor Statistics (BLS) estimates that the number of jobs for woodworkers will decline by 4% between 2019 and 2029. (indeed.com)
- In 2014, there were just over 237,000 jobs for all woodworkers, with other wood product manufacturing employing 23 percent; wood kitchen cabinets and countertop manufacturing employing 21 percent. (theartcareerproject.com)
- Average lumber prices rose about 600 percent between April 2020 and May 2021. (familyhandyman.com)
External Links
How To
How to make wood joint
This tutorial will demonstrate how to join two pieces together of wood. We will be using the "pocket-hole joint", which involves drilling holes in wood and then gluing them together. If your wood is straight and flat, this method will work well. You might consider dowel joinery if your wood isn’t straight or flat. These are the steps
-
Drill Pocket Hole Joints. To start, measure and mark where you want to put the pocket hole joint. Use a jigsaw or handheld drilling machine to drill 3/8 inch deep holes at the ends of each wood piece.
-
Sand Smooth. Sanding the edges of the wood will help to prevent the joint from splitting later.
-
Glue Together. Apply glue to both the ends of the wood. Let the wood sit for 5 minutes, then clamp it together.
-
Fix the Pieces together. Once the glue has dried, clamp the pieces together so they are flush.
-
Trim Joinery. Trim the excess wood around the joint after the glue has dried completely.
Be sure to leave enough space between each piece so that they can be turned inside-out.