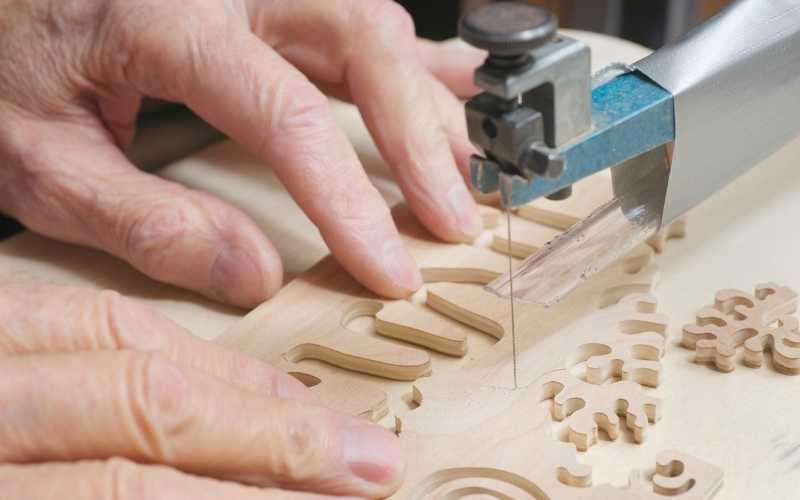
These are some tips to help you make the most of your scroll saw. These tips will allow you to safely and effectively use your scrollsaw. Securely screw the scroll saw into the workbench. If it's not securely screwed into the workbench, vibration could cause it to slide along the surface. Finally, ensure that the blades have been properly installed. Now that you have all the necessary features installed, you can begin making furniture. Now you can use your scroll saw.
Dust blower
General International 21 inch Tilting Head Scroll Saw features solid upper and lower parallel arms that provide stable operation. It also has a dust blower. You can also hook up a dust collector to collect sawdust during your work. This saw makes detailed cuts without producing excessive noise, and features a dust blower that's easily adjustable for various air flow directions. You can also use this saw as a shop vac if you have one.
Tilting table
Here's how to use your scroll saw with a tilting desk. People love to spend hours using a scrollsaw, but it can be painful to sit on the table for long periods of times, especially if your neck is stiff or your shoulders are stiff. There are several ways to fix this problem and make your scrollsaw more comfortable.
Spiral blades
A straight blade is best if you need to make straight, long cuts with your scroll saw. Although it can seem tedious to switch between spiral or straight blades at times, it is easier and produces better results. If you're looking for a simple blade that can cut through a wide range of materials, try spiral blades. These blades have teeth that reach the end of the blade.
Variable speed
It is crucial to choose the right scroll saw blades for your project. Scroll saw blades are available with a range of sizes and tooth configurations to fit different materials. The number will indicate how thick the blade is. Smaller blades are used for thinner woods. Here are some features of the best scrollsaw blades. For the best results, make sure the blade is right-sized for the material thickness you plan to cut.
Transferring patterns with colored carbonpaper
Before you start carving, it is a good idea to transfer the patterns onto colored carbonpaper. Lay a piece of carbon paper over the desired pattern, then tape the other side. Clear packaging tape can also be used. It eliminates the need for adhesive removal and sanding. Once you have taped the pattern to the carbon paper, use a dull pencil or ballpoint pen to trace the design. Be careful not to move the pattern papers when you are tracing. Otherwise, you might end up cutting the wrong pattern.
Keep a variety of blades in your arsenal
You might want to have spare blades if you are just starting out with a scrollsaw. The scroll saw is prone to miscuts. Adjusting the tension of the blade is crucial before you begin. It can also break if the blade isn't tightened correctly, so it's a good idea to budget for several spares. You can purchase extra blades at a local hardware store or online.
Use an eraser and a pencil
A good tip for learning how to use a scrollsaw is to create a sketch in pencil, then attach it to your workpiece. Before you start your project, make sure to check the settings of your scroll saw. After you have drawn the design, drill 1/4 inch holes through the center of the piece. Use the blade to thread through the hole. Then work your way outwards. Make sure to be cautious when you guide the blade.
Choosing the right blade

It can be confusing when buying a scroll saw for the first time. Different types of blades have different specifications, and if you're just getting started with a scroll saw, you might want to practice with several different types to determine which one is best for you. Each type has a unique design and function that is tailored to a particular job. Here are a few tips for selecting the right scroll saw blade:
FAQ
How can I organize my shop?
To keep your workshop tidy and organized, you should first create a place for tools storage. You want your tools to stay clean and free from debris and dust. You can hang tools and accessories with pegboard hooks.
Where can I locate free woodworking plans
You don't need to purchase any books or magazines to find free woodworking plans. All you need to do is search Google. You can search Google for "free woodworking" and hundreds of websites will appear allowing you to download plans.
What is the difference in a hobbyist and professional woodworker?
Hobbyists love making things from wood while professionals are more concerned with the quality of their work. Hobbyists are proud of their creations and will often share them with family members and friends. Professionals will spend hours researching designs before they begin working on a project. They will pay attention to every detail, from selecting the best materials to finishing the project perfectly.
Is it difficult to start my woodworking business?
It is not easy to start a woodworking business. You will need to adhere to many legal requirements. It doesn't mean that you have to go through the entire process of starting a business. Many people prefer to join existing companies. This way, you only need to pay membership fees and taxes.
Statistics
- Average lumber prices rose about 600 percent between April 2020 and May 2021. (familyhandyman.com)
- In 2014, there were just over 237,000 jobs for all woodworkers, with other wood product manufacturing employing 23 percent; wood kitchen cabinets and countertop manufacturing employing 21 percent. (theartcareerproject.com)
- Overall employment of woodworkers is projected to grow 8 percent from 2020 to 2030, about as fast as the average for all occupations. (bls.gov)
- Most woodworkers agree that lumber moisture needs to be under 10% for building furniture. (woodandshop.com)
External Links
How To
Here are some tips on how to drive nails in wood
To drive a nail into wood, the first step is to select the right size and type hammer. There are many types of hammers that you will find: claw hammers and sledgehammers; mallets; ball peen hammers; and hatchets. Each kind of hammer has its own advantages and disadvantages. A claw hammer works well when you're trying to hit nails with a heavy hammer. However it is difficult to precisely control where the blow hits. A sledgehammer is great for hitting large areas at once, but it's too heavy to use effectively for smaller tasks.
Place your hand flat on the side of your chosen hammer so that the handle rests in your palm. Grab the handle tightly, but do not squeeze too hard. Keep your wrist relaxed and the hammer straight up. Now, move the hammer towards the center of the nail by swinging it back. The impact of the hammer hitting the nail should be felt. Try practicing with a block to help you master the art of swinging a stick.
Hold the hammer near your body until you're ready for the nail to be driven. You will need to position the nail so it is parallel to the wood. Keep your focus on the tip of each nail. Move the hammer forward and then continue to move the hammerhead. You can repeat this several times, increasing your swing speed. After mastering the technique, you can add power to your swings. To make it more powerful, hold the hammer up high to your shoulder and then bring it down. This will allow you to exert more energy.
After you have nailed the hole, take the hammer off the nail. To pull out the remaining nails, use a screwdriver or pry bar. Keep the nail heads parallel to the board's surfaces in order to avoid splitting wood.